Recently I went about standing up a fresh Continuous Delivery pipeline for a new project. The project is a relatively standard containerized stack with nothing exceptional to speak of, and as our exploratory work was already in AWS I decided to launch this CD in AWS CodePipeline. Furthermore, we wanted to dogfood our long-term infra management (this project is infra abstraction/automation software) and so opted not to use TerraForm or CloudFormation templates - that way we could have a fully “Clickops’d” infrastructure for our tools to reclaim and manage. Besides, Clickops is easy right?
To my surprise, nothing worked. Deploying CD for a very standard stack (details to follow) via GUI clicks is a bizarre dance filled with broken states and never-resolvable circular dependencies, magic file/variable names that are either not documented or documented incorrectly (like the variety of spellings for appspec.yaml / AppSpec.yml / appsec.yml across AWS CodeDeploy docs), cryptic error codes, and incompatible default settings. Some of this is nothing new - all the clouds have quirks. But I was taken off guard by just how bad, how completely non-functional I was suddenly finding these services which I had used happily for years.
Maybe I have gotten too comfortable with infra as code, or maybe ECS and CodePipeline have gotten significantly more brittle in the last year. Maybe this is the multiverse where AWS services are much, much worse and I am a lost traveler. Whatever the reason, I decided that once this project was successfully deployed I would codify the process, in detail, as a guide for others (and my future self). This is that guide.
How To Guide:
We are setting up a blue/green deployment of a containerized application. The application uses docker-compose locally with one application container, one db container, a sidecar container (in our case logging, but can be anything) and an nginx container to serve web content. In AWS our stack will be:
- CodePipeline to manage our blue/green deployment via CodeBuild and CodeDeploy
- A single ECS service running on Fargate
- A single Elastic Load Balencer
- ECR for storing our container images
- SecretsManager for managing our environment variables
- Github as our source code provider
- CloudFlare for our DNS and proxy provider
There are numerous security groups, IAM roles etc needed in combination to make this all work, along with support elements like ACM to store the CloudFlare origin cert that I won’t directly call out here, but will be noted in the process.
This deploy will blue/green the whole of your container stack - this means if your sidecar(s) or nginx need to roll back they can also do so. The downside is that they are all built with every deploy. If you want to add more complex checking logic later to only build changed containers, go for it.
Do not skim this guide! If you are like me, you normally skim over these things, copy the code examples, and refer back when you hit errors. Don’t do that. The ClickOps process here is like a ritual dance, missing one tiny step will anger the AWS gods and you will have to start over from the beginning. Suck it up and read the whole thing, and follow exactly step by step, or pain will follow.
Legend
To minimize repetition I am going to use some shorthands:
- The 🧐 icon means Follow directions exactly. I know, AWS docs or a tutorial might claim you can change the filename or specify the path somewhere; my experience has been that not all the configs are respected, and often only the default paths/names actually work. If you choose to deviate, best of luck to you.
- The ☢️ icon means Thing for future us to improve on. This may mean tightening access scopes, moving elements to dedicated VPCs etc. This guide may be all that is needed for a small experimental startup, but you probably want to think about designated accounts / multi-region /mutli-cloud / multiverse in the future, and that’s beyond the scope here.
- The aws account number for the examples will be
123456789012. You can find-replace with your account. - The project name will be
bash-dog. You can find-replace with your project name. - The AWS region will be
us-east-2. You can find-replace with your default region.
Steps
Start your magic files.
Our pipeline needs 3 files placed in the root directory of your project.
- 🧐 The
taskdef.jsonbehaves similar to a docker-compose.yml in ECS - 🧐 The
appspec.yamlfile which pulls together the CodeDeploy deployment (Note:appspec.yamlis the correct, and AFAIK only working naming convention for this file). - 🧐 The
buildspec.ymlfile which is similar to any CI actions file you may have used, it is basically a list of bash commands run in a “builder” context. also note thatbuildspec.ymlandappspec.yamlhave different filetype suffixes. Yay.
Here are the files you should start with.
I strongly suggest cloning them as-is and updating only the elements as you follow along. To quick copy them to your project root (where they must live):
cd bash-dog/ # your project root
curl https://gist.githubusercontent.com/norton120/61e9a94f035da8202ab74e41e1705087/raw/9b253c5ba06b05cbe1f6038d65b8690ffe088bd5/appspec.yaml > appspec.yaml
curl https://gist.githubusercontent.com/norton120/61e9a94f035da8202ab74e41e1705087/raw/9b253c5ba06b05cbe1f6038d65b8690ffe088bd5/taskdef.json > taskdef.json
curl https://gist.githubusercontent.com/norton120/61e9a94f035da8202ab74e41e1705087/raw/7ee3330bbbc33f3376cdc996a186cd0e90152e9a/buildspec.yml > buildspec.yml
Commit these files to your codebase.
Making your project deploy-able
This is a whole other topic in itself, so I’ll stick to the assumptions made with this current set of files and let you sort out what changes you may want to make:
- One dockerfile, named
Dockerfile, contains all the image definitions for your deployment. - Each image to be deployed is targeted with the same name as the service you are deploying, i.e. the
apiimage definition in yourDockerfileis defined asFROM some-image:tag as api. If this is foreign to you check out Naming your Builds. - Your code builds environment-agnostic, that is, the same build runs locally as in production. Things like requirements files and entrypoints are managed via an environment variable and not a different set of build steps.
- Each service (i.e. container) runs on a different port. The
awsvpcnetwork addresses each of your containers via localhost (not the assigned container name!) so your containers cannot have port collisions. - Only nginx will be exposed to the load balancer. Your nginx image needs to have an
nginx.confthat routes traffic to all the other containers in your stack. - Kinda goes without saying, but your nginx container should get port 80. We will be encrypting traffic from the load balancer to CloudFlare via origin cert (CloudFlare will handle client encryption), and restricting direct access to the container. Commit whatever changes you’ve made. For the duration of this deploy process it may save your sanity to turn off branch protection and deploy directly to main 😱. Otherwise you will need to PR each tiny file tweak, and the PR process is basically valueless rubber-stamping in this case.
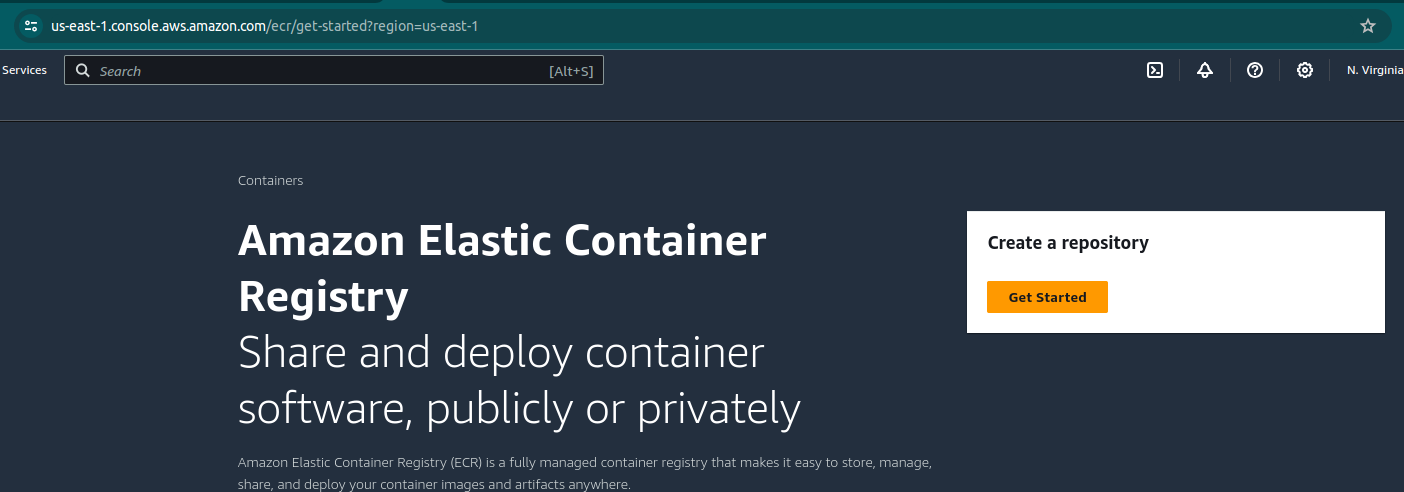
ECR Images
This whole build process centers around container images stored in Elastic Container Registry (ECR). Navigate to ECR in the AWS GUI and click “Get Started” under “Create a Repository.”
Name the repository with your project and service, i.e.bash-dog-api
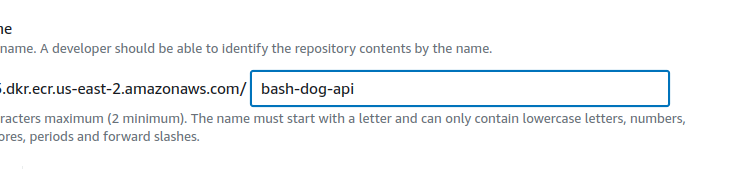 🧐 leave the defaults as they are. You need mutability to retag
 latest. Repeat for each of your services.
You shouldn’t need to worry about docker hub rate limits, because our buildspec.yml preloads your existing image as part of the pre-build, so CodeBuild will only pull from docker hub the first time you build. If this does become an issue for some reason (you start getting failed builds because of dockerhub limits for images like niginx and python) then you will want to add ECR repos for these base images as well and point your Dockerfile towards them. That requires local login to ECR and complicates things, so we will avoid it for now. Just keep in mind that if you run into this issue, you’ll add these base images to everything we do here.
docker login --username AWS --password \
$(docker run \
-e AWS_SECRET_ACCESS_KEY=${AWS_SECRET_ACCESS_KEY} \
-e AWS_ACCESS_KEY_ID=${AWS_ACCESS_KEY_ID} \
-e AWS_SESSION_TOKEN=${AWS_SESSION_TOKEN} \
-e AWS_DEFAULT_REGION=${AWS_DEFAULT_REGION} \
--rm amazon/aws-cli ecr get-login-password) \
123456789012.dkr.ecr.us-east-2.amazonaws.com/bash-dog-api
note: this is using identity manager temporary creds. Use whatever strategy you prefer for authenticating the aws-cli container. Now build and tag your image:
docker build -f Dockerfile \
-t  123456789012.dkr.ecr.us-east-2.amazonaws.com/bash-dog-api \
--target api .
note the --target needs to match the target we are building. Once the build is successful, push it up
docker push 123456789012.dkr.ecr.us-east-2.amazonaws.com/bash-dog-api:latest
Rinse and repeat for each of the services you are deploying. Remember that bash-dog-nginx is our image of nginx with a custom nginx.conf mounted that will serve the sibling containers.
Secrets
We are going to keep all the envars in AWS SecretsManager. This removes secrets from our pipeline and repo code, and makes it less painful to update envars down the line.
- Start by navigating to SecretsManager and clicking “Store a new Secret”
- select
other type of secret - set the key/value pairs. This should be in the format of
ENVAR_NAMEvalue. For example, if I want an envarBASH_DOG_ENVIRONMENTwith a value ofproductionit would look like this: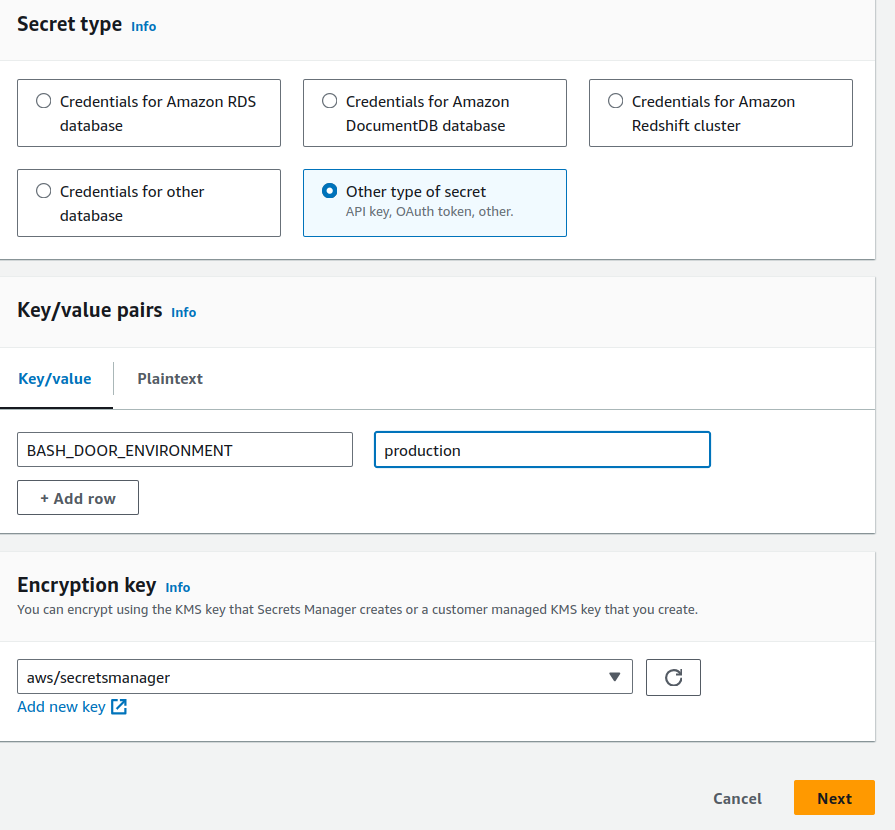
- name the secret something logical like
bash-dog/ecs-envarsand create it. - Once created, refresh the index page and click into the new secret so you can get the whole new arn (complete with the random suffix).
- Head back to your
taskdef.jsonfile. See thesecretssection in the api and sidecar containers? Update as follows:- for each envar you defined (and want for the given container), set a
namekey to match that envar (case sensitive). - Update the arn with the whole new arn you just copied, paying special attention to the suffix on the arn. It must match the envar name you just set, and you need the 2 extra colons at the end.
so setting our
BASH_DOG_ENVIRONMENTenvar in the api container would look like this:
- for each envar you defined (and want for the given container), set a
...
"name": "bash-dog-api",
"secrets": [
	{
     "name":"BASH_DOG_ENVIRONMENT",
     "valueFrom":"arn:aws:secretsmanager:us-east-2:123456789012:secret:bash-dog/ecs-envars-PlIIOb:BASH_DOG_URL::"
    },
...
remember that this arn will be the one you just created, not the example arn above!
- Be sure to delete any example envars you aren’t using, they will cause the pipeline to error if the secret or key does not exist.
- If you have envars that conflict between containers (for example, if each container needs a different
HOSTNAMEenvar) you will need to set up individual secrets for each container. Then reference them with the same pattern, just using the container-specific secret arns for each set of secrets. - Make sure references across containers use
localhostand not the container names; this is one place I’ve found ECSawsvpcnetworking functions differently than a bridge docker network. so
# bad
API_HOST=http://api-container-name:8080
# good
API_HOST=http://localhost:8080
Code Pipeline
I find it is much easier not to get twisted into a dependency pretzel if we start our pipeline at the very end, with the CodePipeline itself.
- Navigate to CodePipeline -> CreatePipeline.
- Name your new pipeline something sensible like
bash-dog-pipeline. - Create a new service role, name it something sensible like
bash-dog-pipeline-role. 🧐 Leave “Allow AWS CodePipeline to create a service role so it can be used with this new pipeline” checked. (don’t try to re-use an existing service role, or hand-roll your own… role. You will hate yourself if you do either of these things, and it just won’t work). - Leave all the other defaults alone and click Next.
- In the next screen select
Github (Version 2). Follow the prompts to create a new Github Connection, and select your repository. - 🧐 For Branch name use your main branch
mainor equivalent. - Leave all the other defaults alone and click Next.
- Next, Create a build project inline by selecting AWS CodeBuild as the provider and then clicking Create Project. In the new window:
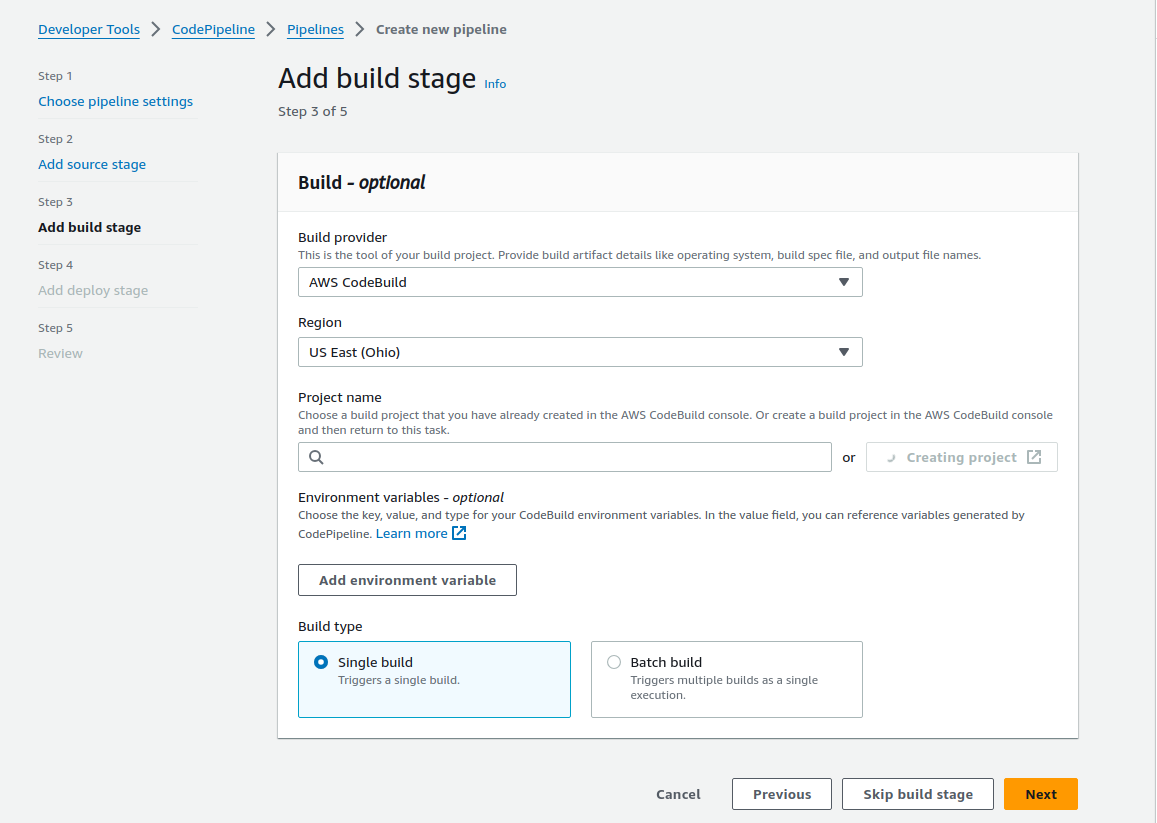
- name your build project something sensible like
bash-dog-build-project.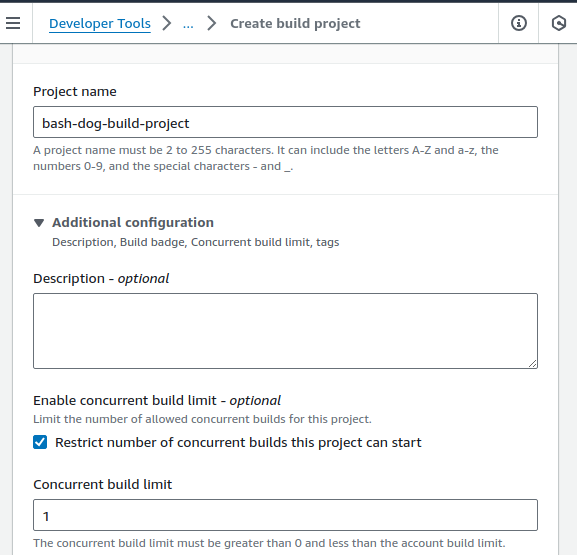
- 🧐 under Additional configuration check ‘restrict number of concurrent builds this project can start’ and set the limit to 1.
- For Environment select
Managed Image,EC2Amazon LinuxOperating system,StandardRuntime, and the 🧐amazonlinux2-x86_64-standard:4.0image (not the default!)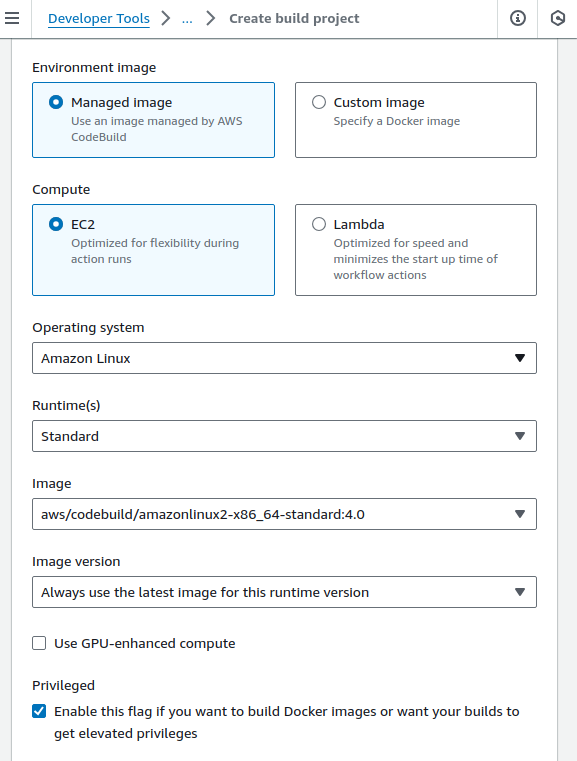
- 🧐 Check ‘Enable this flag…’ under Privileged.
- Leave the default New service role and unless the provided role name is awful, leave it.
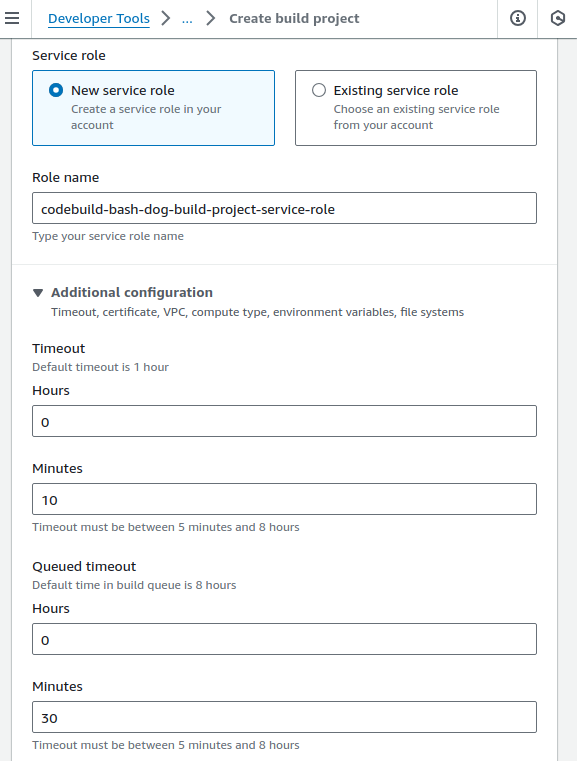
- Optionally, reduce the timeouts. Generally my builds are running < 3 min, so if they are not done in 10 they are probably never going to be done.
- Leave Use a buildspec file and 🧐 do not specify a file name. My experience has been that non-standard filenames for the buildspec/appspec/taskdef files have caused mysterious pipeline failures, but YMMV.

- Set up logging using logical names like
bash-dogandcodebuild.
- name your build project something sensible like
- Skip the deploy stage for now, that needs to be backed-in from a running ECS Service.
- Save and create your new pipeline. Note: The pipeline will immediately build and fail. That’s OK, we’re far from done.
Update Build Role Access
Now we need to update the build service role, allowing it to: - login, pull and push our ECR images - write to our s3 artifact bucket (possibly already configured, but worth double-checking)
- Find that role you just created by searching IAM roles for
bash-dog(well, your equivalent). It should look likecodebuild-bash-dog-pipeline-service-roleunless you changed it. It should also have a policy named something likeCodeBuildBasePolicy-bash-dog-pipeline-us-east-2. Click into that. - Edit the policy and add these statements, updating the image and checking that the s3 bucket arns for the artifacts are present and match what you have in s3.
Run a successful build
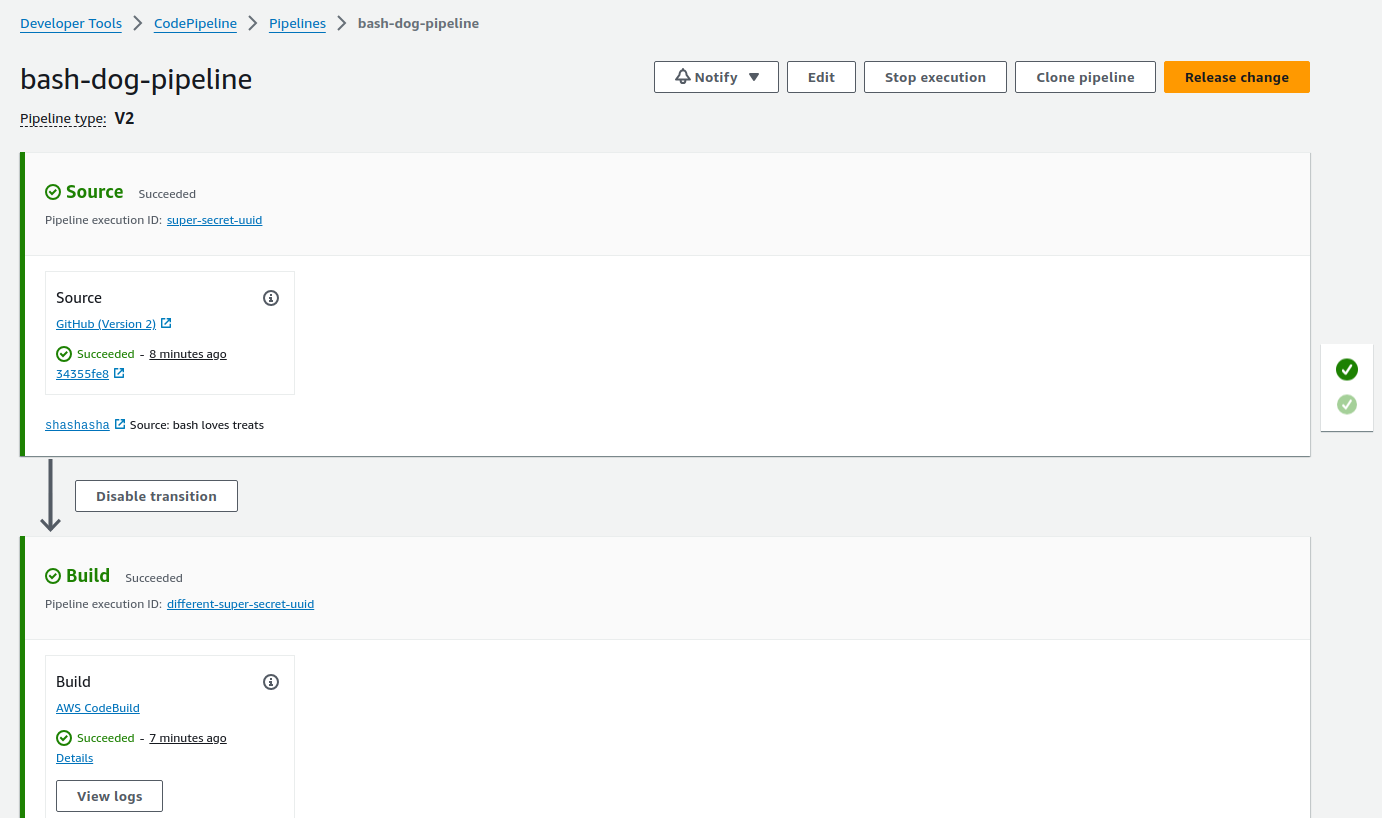
Push all the changes made so far to main in your application repo. If your main is already up to date, you will need to trigger it manually via the CodePipeline with the Release Change button. Let it build, check the logs tab for errors, and with fate on your side you should see this:
Now for the fun part - navigate to the s3 bucket and find the path bash-dog-pipeline/buildArtf/. Look for an artifact with the newest timestamp. Download it. Now check out the taskdef.json file within the artifact. You’ll see the images have been updated to reflect the image sha for the release you just built!
You can also check ECR and see that the same image tag was created.
Adding your Cloudflare Origin Cert and Enabling Full Strict
This seems random at the moment, but you will need this to create your load balancer, which you will do while creating an ECS service.
- Log in to Cloudflare for your respective domain.
- Under SSL -> Origin Certificate click Create Certificate.
- Leave the defaults. Note: the free certs will only work for bare domains (example.com) and single level subdomains (www.example.com).
- Click Create.
- In a different tab, navigate to AWS Certificate Manager and click on Import.
- Back in Cloudflare, time to copy the cert you just created, and paste the values into the respective boxes in ACR.
- 🧐 click the copy buttons. Don’t try to scroll copy, you can grab/miss needed whitespace and break the cert.
- Leave Certificate chain blank. Click through to import the cert. Now you need to tell CloudFlare to use the cert you just created. This is important!.
- In CloudFlare, click into Rules -> Configuration Rules
- Create a new rule.
- 🧐 Set the hostname filter to match exactly the (sub)domain fully qualified host (i.e.
example.comorbanana.example.com). - 🧐 Under then settings are… find SSL, and select “Full (strict)”
- Save your rule OK now your CloudFlare is primed, though we have not set up the CNAME yet (that comes later). Onward with our pipeline.
- 🧐 Set the hostname filter to match exactly the (sub)domain fully qualified host (i.e.
Create all the IAM Roles
ECS Execution needs to be able to access the secret(s) created earlier, and ECS Service needs to be able to do normal ECS task things. CodeDeploy also needs a role. So, we create 3 new roles named bashDogServiceRoleForECS , bashDogExectuionRoleForECS , and bashDogCodeDeployRole in IAM.
you may want/need to modify the AWS default ecsTaskExecutionRole instead of creating bashDogExecutionRoleForECS if you find your Fargate tasks do not reflect the permissions you’ve assigned to your execution role. The docs cryptically imply that Fargate does not respect your execution role - I have experienced it both working and not working with an alternate role, and truth be told haven’t had time to determine if this is a root cause.
The execution role (the role assumed by the host) needs: - AmazonECSTaskExecutionRolePolicy - An inline policy for accessing our secret envars Creating this policy is surprisingly unintuitive. Specify Elastic Container Service (no alias for ECS) and Elastic Container Service. The policy should look like this: Make sure your trust relationships looks like this:
{
    "Version": "2008-10-17",
    "Statement": [
        {
            "Sid": "",
            "Effect": "Allow",
            "Principal": {
                "Service": "ecs-tasks.amazonaws.com"
            },
            "Action": "sts:AssumeRole"
        }
    ]
}
Next, create the Service role (think role assumed within the container). This is pretty straightforward, and is useful because you can add specific services to this role later as needed. This role needs AWSCodeDeployRoleForECS. Make sure the trust relationship of the created role looks like this:
{
    "Version": "2012-10-17",
    "Statement": [
        {
            "Sid": "",
            "Effect": "Allow",
            "Principal": {
                "Service": "ecs-tasks.amazonaws.com"
            },
            "Action": "sts:AssumeRole"
        }
    ]
}
Last create the code deploy role. This role needs the AWSCodeDeployRoleForECS policy, and trust relationship should look like this:
{
    "Version": "2012-10-17",
    "Statement": [
        {
            "Sid": "",
            "Effect": "Allow",
            "Principal": {
                "Service": "codedeploy.amazonaws.com"
            },
            "Action": "sts:AssumeRole"
        }
    ]
}
Create an empty CodeDeploy Application
We will need a CodeDeploy app for our ECS service to set up blue/green deploys in. So navigate to CodePipeline -> Applications -> and create a new application named something sensible like bash-dog-deploy-application. Leave this open. Don’t create a deployment yet, or you will get a weird loop where CloudFormation rips down your ECS Service for having too many deployments associated.
Configure Security Group and IAM Role Rules
One of the most tricky elements of launching your ECS Service is that it really needs to succeed the first time you manually deploy it. If the initial task set for the service is unable to get to a “healthy” state, CloudFormation will stubbornly retry the same broken code until it finally tears down the service - and you have to start all over :sad_cat:. Before you attempt to launch the ECS cluster, go through all the dependent services and make sure you have set up security group ingress rules, access policies etc. ahead of time. Things like:
- does your app need database access, maybe RDS or Dynamo? have you set up ingress/egress policies for the the security group you will apply to the ECS cluster?
- does your app need other AWS services, like bedrock, or SQS, or Lambda? Have you applied all the needed policies to the
bashDogServiceRoleForECS? - are all the envars you need loaded into secrets manager? Try and get as far ahead of things that will break your application before you attempt to launch in ECS, you will be glad you did.
Create the ECS Cluster and initial Task Definition
Setting up the initial runtime is a little bit of a juggling act; You first create your ECS Cluster, Task Definition, and ECS Service with the Service linked to the Code Deploy (but not exactly managed by it yet). The idea is to manually stand up the service and get it to a “healthy” state, and then have CodeDeploy take over.
1. We create a new cluster from the ECS home page. Name the cluster something logical like bash-dog, leave all the defaults. This will take a minute, just leave it and wait until it is ready (clicking ahead will break things).
2. Next we create a task definition that will be used by our service. From the ECS home page click on Task definitions, Create a new task definition (with JSON). Paste the guts of your taskdef.json file (the one in your application repo) and save.
3. Finally we will create our ECS Service. Navigate to the bash-dog cluster and click Create under Services.
- Leave the defaults for Environment.
- Under Deployment Configuration select the task family name you just created.
- Name the service something logical like bash-dog.
- 🧐 Under Deployment Options change Deployment Type to Blue/green deployment (powered by AWS CodeDeploy).
- Leave the default deployment configuration of CodeDeployDefault.ECSAllAtOnce.
- Search and select the arn for the Code Deploy role we created (bash-dog-code-deploy), you may have to go get the arn from IAM and paste it in the first time.
- Under Networking select the default VPC, and de-select all the duplicate subnets (where there are more than one for a given zone). Use the primary subnets if you can.
- Use your default security group (add this to the TODO list of things to harden later)
- 🧐 Leave public IP on. This isn’t just “expose ECS to a public IP and subnet so you can test it;” ☢️ unfortunately, modern ECS Fargate cannot connect to any services (like ECR, SecretsManager etc) without either a public IP or NAT Gateway/PrivateLink setup in a private VPC. Long-term, having our ECS cluster hanging out publicly is not OK - but both solutions add complexity and cost we are not going to cover right now. I’ll try to do separate update on this topic later.
- Under Load Balancer select Application Load Balancer
- Name the load balancer something sensible like bash-dog
- Bump up the grace period to make debugging easier
- Select the nginx container bash-dog-nginx 80:80
- Create a listener on port 443 with https
- Select the ACM cert we imported from CloudFlare earlier
- Add primary and secondary target groups with the default http configs. Name them something sensible like bash-dog-main and bash-dog-secondary.
- Save and wait for the new Service to spin up.
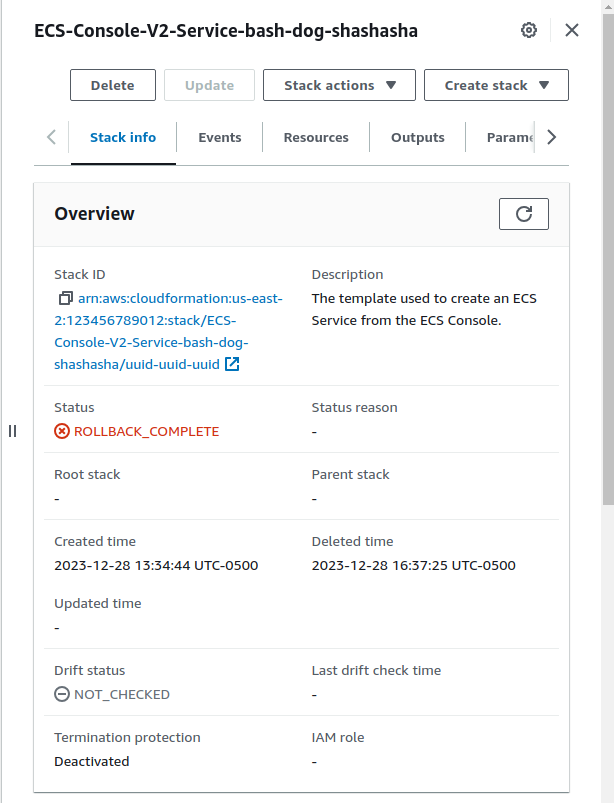
Service Cleanup: if when things go wrong with your service, you may have to either delete it and start over or it may decide to delete itself after several failed deployments. Be sure to completely remove all artifacts once the service is gone, by deleting the corresponding stack for the service in CloudFormation. Lingering artifacts (especially if you use the same sensible service name again when you retry) can result in all kinds of strange and sad behavior. This can take a while; be patient. Jumping ahead and re-building the new service while the old one is still deleting will cause you pain.
At this point, if all goes well our service should be up and running. You can check in on the container logs via ECS Homepage -> Clusters -> bash-dog -> services -> bash-dog -> logs. We can now wire up the domain and make sure the initial deploy is working!
Set up CNAME Record
Head over to the load balancer we created - you can find it by navigating to the ECS Service homepage and clicking on the listener, then from there the load balancer. Grab the DNS name of your load balancer.
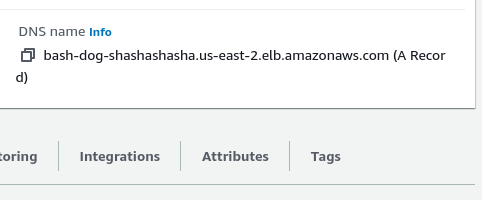
You can throw this in a browser and get an unsafe warning (which is fine, the cert it is using is made for CloudFlare not for visitors). If you bypass that warning, you should see your application!.
14 .#### Completing the pipeline Time to automate your now working-but-manual pipeline.
- Head back to CodePipeline, and in your
bash-dog-pipelineand edit the pipeline. - add a
deploystage.- 🧐 Select
Amazon ECS (Blue/Green)as provider. - For artifacts select BuildArtifact
- For AWS CodeDeploy application name and AWS CodeDeploy deployment group you want to select the app and group created by your ECS Service; these should have a random prefix, like
AsFbaw-bash-dog-bash-dog. - For the Amazon ECS task definition put 🧐 exactly
taskdef.json. - For the AWS CodeDeploy AppSpec file put 🧐 exactly
appspec.yaml - Leave Dynamically update task definition image - optional alone, do not add or change anything.
- Save your new stage (3 saves to get all the way out), confirming the changes to the pipeline.
- 🧐 Select
- Under CodeDeploy -> Applications -> name_of_generated_application -> Deployments, click into the active deployment.
- scroll down to Deployment Settings at the bottom and set the original revision termination to something rational, like 5 minutes. Otherwise every deploy will take over an hour to be “complete.”
- Save and exit.
OK. Now the big moment. Push some code to a branch, create a pull request, merge that into main and….
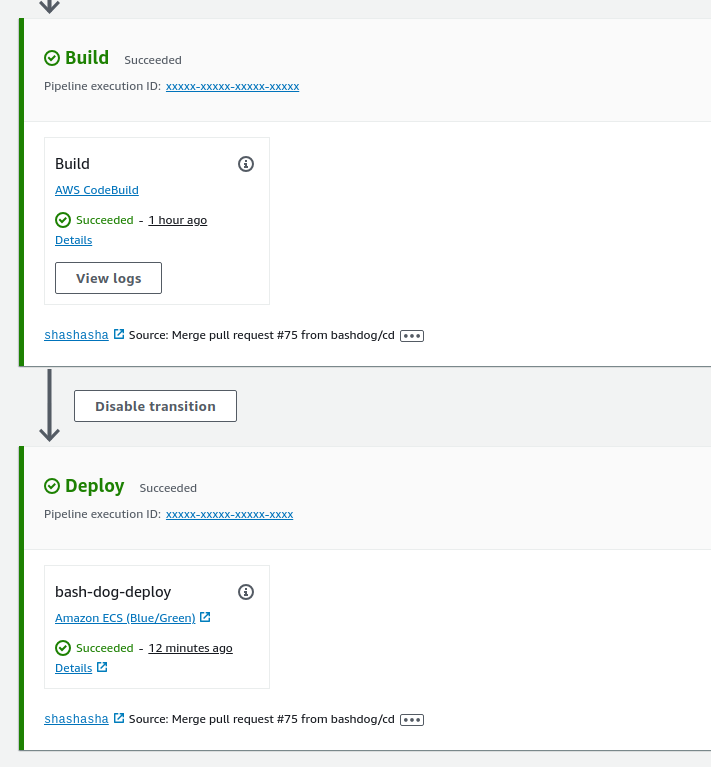
You have a working, automated blue/green deployment for all 3 of your service containers.